Showing posts with label Before and After. Show all posts

Wednesday, July 20, 2011

New Shades...

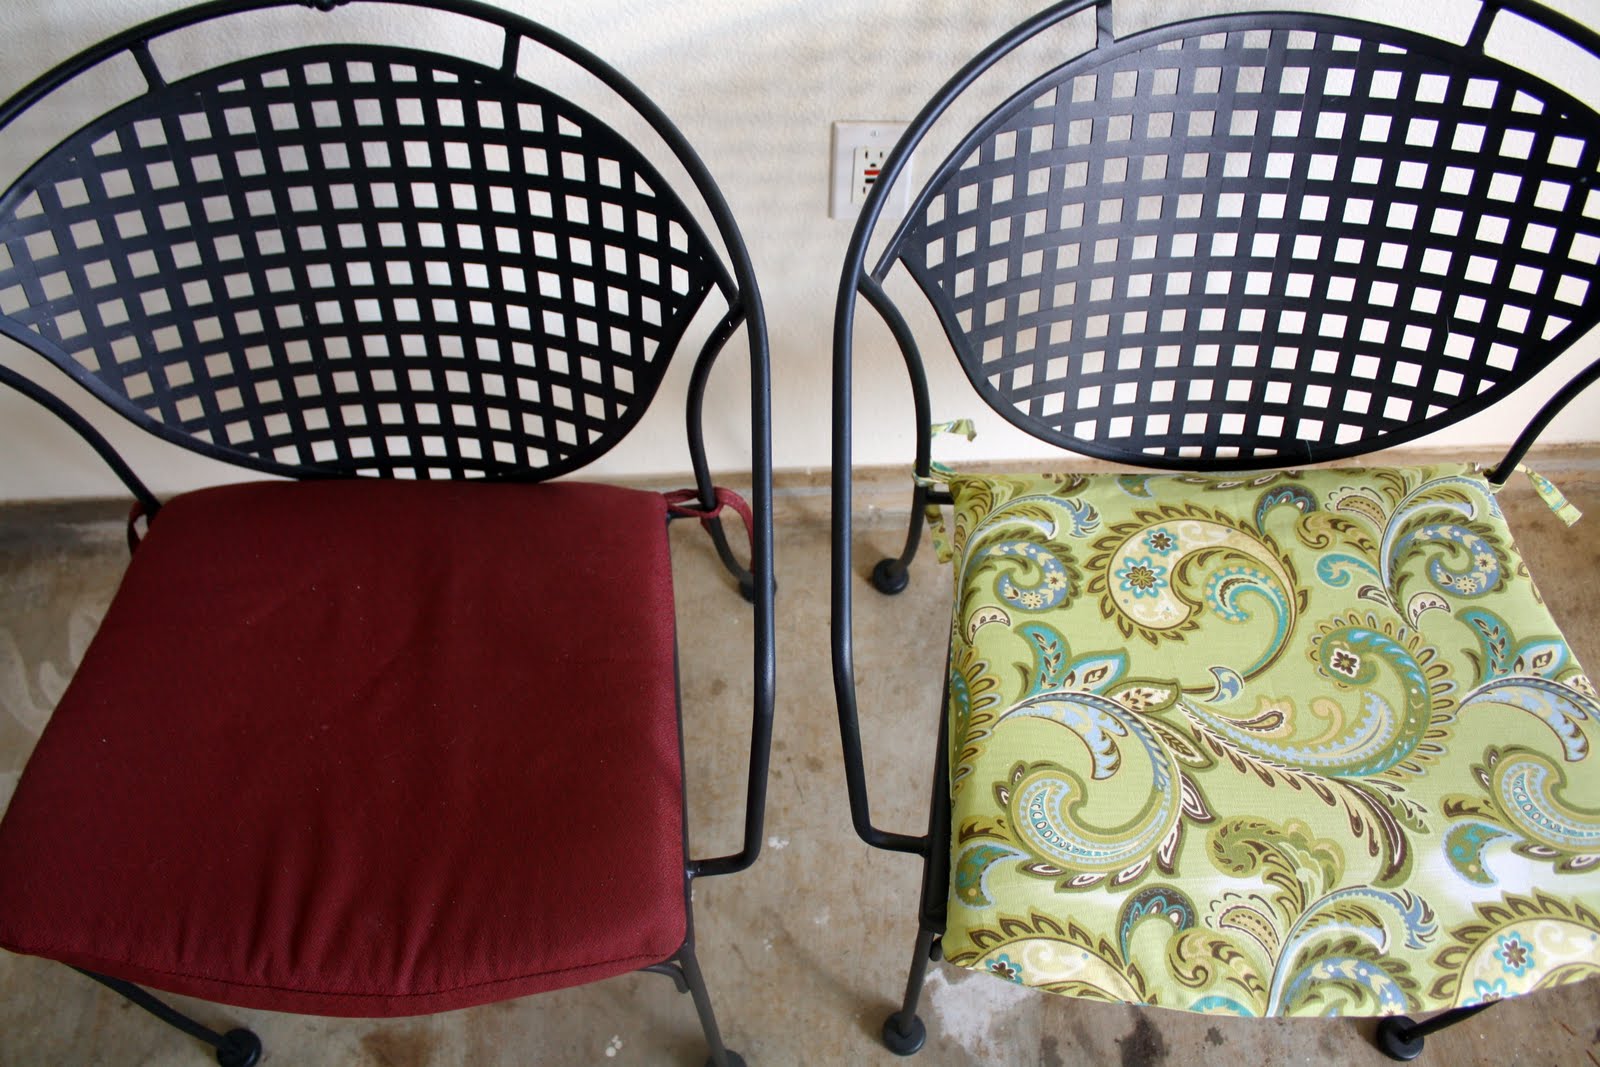
     While the hubby was away, I made quite a few changes in the house.  For instance, I painted the living room, gave new life to a papasan chair that had been trashed, re-covered the cushions on the lanai furniture, put up fun lanai lights, and put down some indoor/outdoor rugs in the lanai.  All the changes made our house a much more pleasant place to be, and the changes to the lanai helped the space transition from a nearly unbearable/unusable oven to a space where you actually wanted to spend time. 

     When he got home, he loved all the changes... especially the lanai.  He carries his laptop out there to eat his breakfast, check e-mails, and read the news every morning.  Although we both agreed that the space was much more welcoming and fun, it was still just too hot during the middle of the day and throughout the mid-afternoon.  (I had secretly wanted bamboo shades, and I came super duper close to buying them while he was away, but I decided against it until I knew if we would spend much time there.)  Sitting out on the lanai the other morning, however, the husband said, "Do you know what we need out here?  Blinds or something.... It would make it so much cooler."  Bingo!  If it's his idea, we can go all out! 

     So to the store we went, and we came home with new bamboo shades.  I love them!  The keep a lot of the bright sunlight out, but they aren't completely solid, so we can still get some natural light and see what's going on outside.  In the photos, you don't get the full effect because it's impossible for them not to be backlit, but you'll get the idea.


Oh... And Kent also had the idea (with a few hints here and there) that it would be super awesome to have a ceiling fan out there.  That's why there's a hole in the ceiling and a light fixture on the table.

Yesterday, we he decided to install the ceiling fan.

This is what my living room floor looked like for about 2 hours...

He had a few setbacks (mostly because he refuses to look at instructions), but it's finally up.

And it rocks!
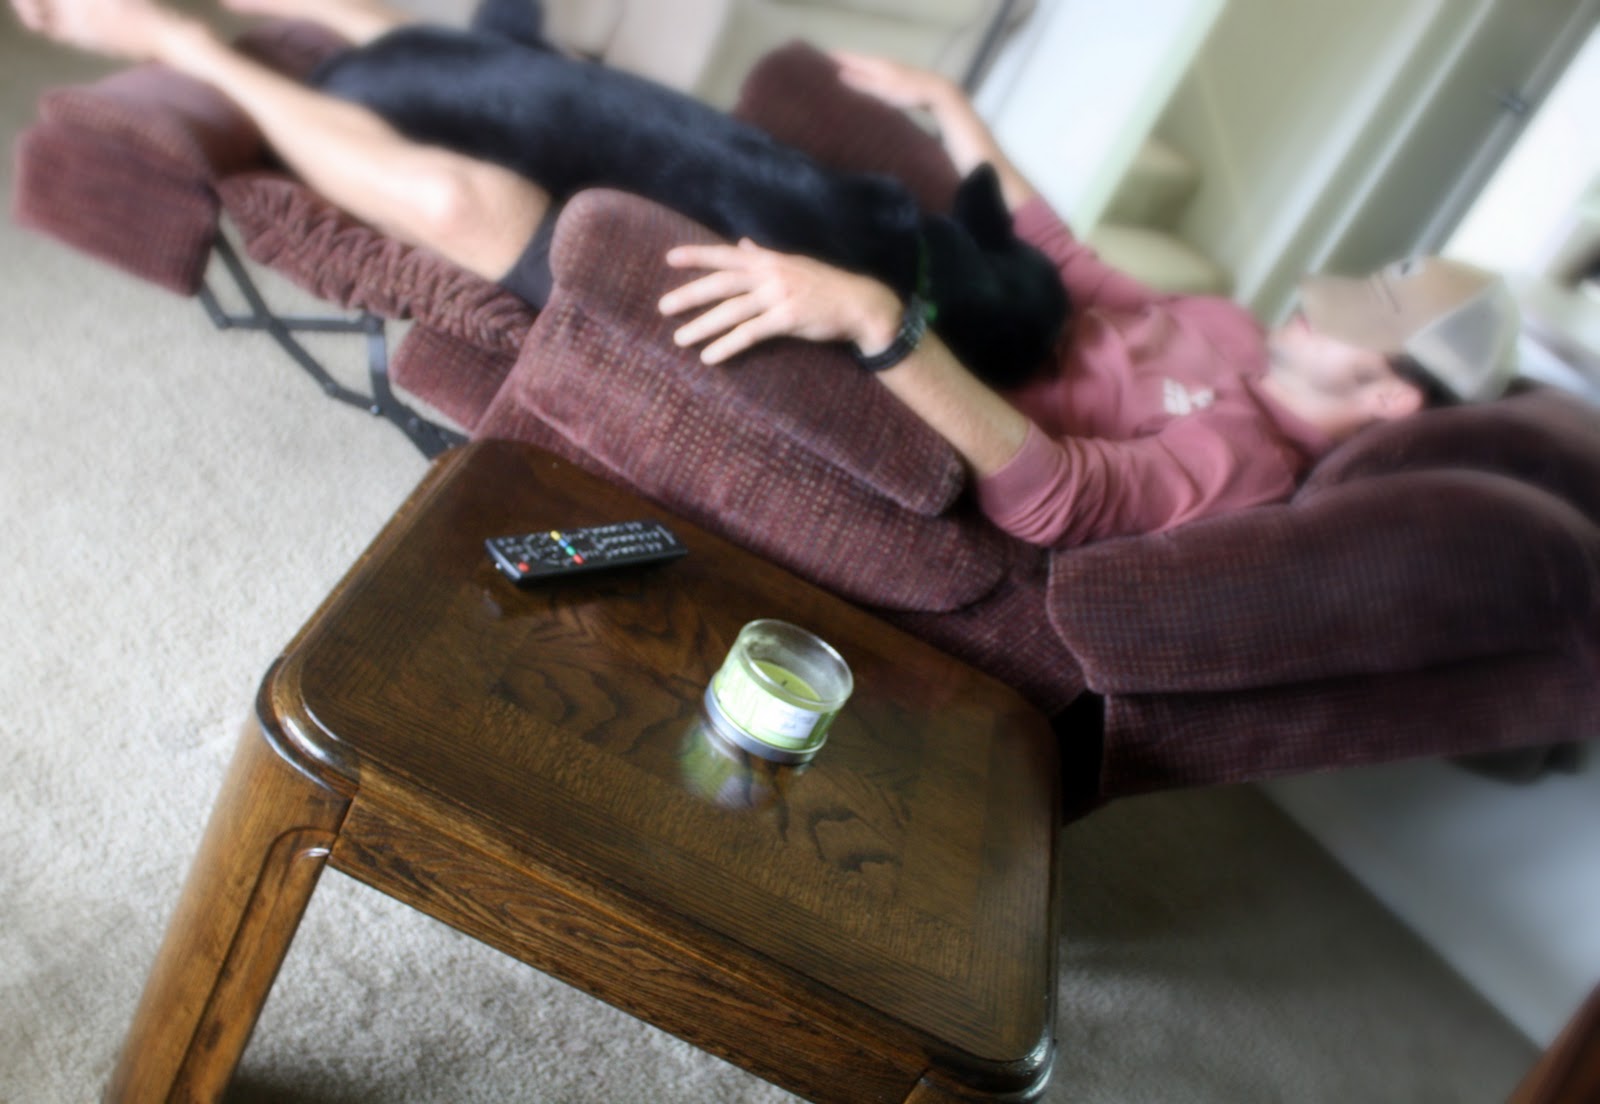
Yes... That's Duke in Kent's lap in the papasan.  Big baby...

And just so you can see how far things have come, here's a before and after...
Well, I'm off to enjoy my awesome lanai!  Hope everyone is having a great Wednesday!

Thursday, June 2, 2011

Simple Panels, Big Change

After struggling with absolutely no motivation to do anything for the past week (including going to the grocery store, which means I was basically starving until I gave in yesterday and went), I finally got my tail in gear.  I did a major cleaning in my house-- counters, windows, mirrors, toilets, tub (which I loathe), baseboards, dusting, mopping, vacuuming, the whole kit and kaboodle.  Then, I decided it was time to finally make curtains for the guest room. 

Forgive me.  I didn't take pictures during the process because I was in the zone. 

I didn't have a pattern, and I didn't feel like hunting one down, so I just spread my sheet out, measured a little, and started cutting.  I had a plan in mind... I just had to do it. 

About 4 hours later... after measuring, cutting, sewing, ironing, sewing some more, and ironing some more, I had curtains hung!

I decided to go practical and go with panels.  Since the guest room is probably 
the brightest room in the house, I wanted my guests to be able to block out 
some light if they wanted.

I went with drop panel curtains so that I could get the pieces for all the curtains out of one single flat sheet.

And just because I want you to see what's outside the guest room window...
Don't you want to be my guest and see a palm tree outside your window when you wake up?

Finally... you guys know I love some Before and Afters, so here you go.
I had no idea what a big difference these simple little curtains made until I saw this.  What do you guys think?  

I still have to re-do some furniture in this room, but that's for another day.  :)

Hope you're having a great Thursday!

Thursday, May 26, 2011

It Doesn't Take Much...

Even though I've been trying desperately not to, I have still been feeling just a little down lately.  I guess it's partially being lonely,  but the really weird thing is that I don't really want to "go and do" all that much even with friends.  It's almost like feeling "burned out," but I don't really know what I'm burned out on.  I think it's probably just that it's been a stressful week or two, and I'm tired of doing everything around the house completely by myself instead of sharing the responsibility with someone.  (I know people live alone all the time... I just didn't really choose to do it.)  I think the monotony of the little daily chores get to me sometimes... as silly as it sounds.  If the trash is going to get taken out, I have to do it every time.  If the dogs are getting walked, I do it.  If groceries are needed, I go to the store, unload them, and put them up by myself.  Just things like that...

It's all good, though.  I'm really not complaining.  I just need a few days to recharge and refresh.  Lazy days.  Nothing days.  The kind where I lay by the pool and read, go on easy walks with my dogs, or veg out watching old movies.  A few of those, and I'll be good as new.  In the meantime, I've been doing a few little things to add some interest and "happiness" to the space around me.

It really is amazing what adding a little color, a little rug, or a little curtain will do for you.  Each time I do something to "prettify" my house, it refreshes me and makes me feel more ready to create something else.  Creative spaces, I am pretty sure, lead to more creative minds. 


If you remember a while back when I was making plans, I wanted to make my lanai a more fun place to hang out.  I've been working on that for the last month or so, little by little.  My hope is that we'll be able to use that space much more when Kent comes home-- a place to have dinner with friends or just a place to relax in the evenings.  I've put up some lights, recovered cushions, rescued a papasan chair, and yesterday I added a rug.  I think it has made all the difference.  (I keep wanting to spend a lot of time out there... just need someone to talk to now... haha)  What do you think?


And from the other side...

Those few simple changes were huge for me.  It finally feels like a "real" room.

The other little change I've made in the past few days was making a simple valance for my half bath.  I had a little extra yellow fabric, so I decided a cute yellow curtain would bring a little sunshine to my world.

I didn't have a before picture.  This little bathroom is so tiny, it's super awkward to photograph.

As silly as it might sound, I smile when I walk by and see that little curtain.  It's such a little window, so I think it's cute.  Funny how simple little things like that make such a big difference...

Hope everyone is having a happy Thursday!

Wednesday, May 25, 2011

A Little Color in My Life...

**Before the "real" post today, I just wanted to say that the past weekend was a crazy one, and nothing went quite according to plan.  That's why the regular "What's Cooking Wednesday" is on hiatus... I just didn't want to cook.  ;)  And an update on Duke... He is pretty much back to himself, thank goodness.  We don't know if it was the antibiotics, some rest, or what.  We're just glad he's better.  Thanks for the kind words and sweet thoughts.  Now... back to the "real" post of the day.**

So, I always had this idea of what it would be like to be a grown up and have "my own place."  I was going to be able to choose my curtains, my furniture, my counter tops, my flooring, and paint my walls any color I wanted. 

And then I got married to the military...

For us, buying is not really the best idea because we'll have to leave at some point (at least right now, anyway).  Therefore, we get "rentals."  Don't get me wrong, we live in some of the military housing on the island, and compared to the place we had before this one, I LOVE our current place.  It reminds me more of home.  The neighborhood is like a normal neighborhood back home-- grassy areas, cute homes, sidewalks, and all that good stuff.  I even love the amount of space we have here.  I would say it's one of the best deals on  the island since spaces here are usually soooooo tight.

The only drawback is that it's not "ours."  Not really, anyway.  I can't just go change all the things that bother me... like knock out the wall between the living room and lanai so I would have one big usable living area, instead of a tiny living room and a too-hot-to-use-most-of-the-time lanai, or put down prettier flooring.  I guess I just like things personalized.  The only thing we can really do is paint... and even then, it has to be painted back before we leave. 

With that in mind, I went back and forth, back and forth on whether or not to paint.  I didn't want to put a lot of work into something that I would only use a "short while." 

Then, the other day as I was sitting in my living room, looking up at my oh so boring and monotone walls, it hit me. Even if I only stay here another year, one day of work is worth that year of enjoyment.  I need color in my life!!!

So, what did I do?  I got in my little Jeep and went to Home Depot for paint samples.  I was on a mission, and I was going to have some color... pronto. 

It didn't take me long to decide on the colors, so I was back the next day for the real deal.  When I got in the car with my paint, drop cloth, tape, brush, and roller, I knew there was no turning back... so I went home and worked all. day. long. 

At the end of the day, when I collapsed into an exhausted heap on my couch, I just stared at the walls and couldn't help but smile.  I'm so glad I went through with it.  The color just makes me so happy, and it makes it feel so much more like a "home" to me.  What do you guys think?


I also did one accent wall in a color a few shades darker...
(I didn't have a before photo from the same angle... even though I thought I did... And this "before" was quite a while ago before we got a "real" dining room table.)

Is anyone else super affected by color like me?  Have you found it was worth it to paint in a rental?

Wednesday, May 11, 2011

Another Man's Trash...

Well, I'm not ashamed to say that I scope out the "bulk trash" in my neighborhood. It's the stuff that people put out just before big trash pick-up day.  You never know what people are going to put out-- chairs, wooden tables, patio furniture, etc.  It's always fun to check things out and search for something with potential for a makeover.

Just the other day when I was on my way home, I spotted something on the side of the road that I have always wanted.  Well, in it's condition at that moment it wasn't what I've always wanted, but it had potential.  (I should have thought to take a picture of it in the bulk trash heap, but I got excited and didn't think.)  I pulled over, pulled it out of the heap, and headed home.

What was it that I pulled out?

It was the frame for a papasan chair, and it looked something like this. (Minus the blue paint on the stand.  I realized after the first swipe of spray paint that I didn't take a "before" picture.)

 
I decided to liven the old frame up and spray paint it blue.

Pretty big difference...

Now that I had this snazzy "new" papasan chair frame, I needed a cushion.
Sure, I could go down the road to Pier 1 and pay $80+ for a cushion, but (1) I'm too cheap for that, and (2)  where's the fun personal touch in that?  Oh, and did I mention I'm too cheap?

 Since buying a ridiculously expensive cushion was out, I decided to make one.  Now, I've never in my life made a papasan chair cushion, but I figured if I could make a pillow, I could make a cushion, so I looked up some ideas online.  I sort of combined different things I read and just got started.  

First, I measured the diameter of my chair, using a sewing measuring tape so it would contour with the curve of the chair.  I added about four inches to that number-- to account for "fluffiness" and the parts turned under while sewing, and that was the diameter of the circle I cut out.  

I laid out the fabric (I bought about 4-5 yards) with right sides together, and then marked a center point.  From that center point, I went all the way around marking at half the diameter (the radius) of the circle I wanted, and then I cut it out.


Now that I had my circle, I sewed it like a normal pillow, going all the way around the edges, leaving about a 2 foot gap so that I'd be able to stuff it.  Trust me, you need that big opening because I literally climbed inside while stuffing my cushion.

For the stuffing, I decided to use what I'd seen online-- several regular sleeping pillows cut into wedge shapes.  I went to Wal-Mart and bought about 7 of their $3 pillows... a grand total of about a $20 investment.  (You can use fewer pillows, but I decided to go big or go without.)
Then I cut them from corner to corner, creating pillow "wedges."

Yeah, Murph thought it was his new super huge and fluffy bed.

I arranged the wedges with the points all towards the center, creating a circle.  You may want to test it to make sure it's "fluffy" enough for your taste.

Finally, I finished up by stuffing the cushion, sewing up the opening, and tying off a few different points so that the cushions won't move.  (For the tying off, you'll want to use a great big darning needle and some strong yarn... especially if you make a super stuffed cushion like I did.)

I can't tell you how pleased I am with this chair.  I LOVE it.  At first I thought it might stay on the lanai since my total investment was only about $60, including paint, pillows, and fabric, but since it's so super comfy, I think it might have to find a home in the main part of the house.

Since the hubby is gone for a bit, I've temporarily moved his recliner out of the way so I can snuggle up in the papasan to watch my Golden Girls in the evenings. 

I'm not the only one who is in love with this chair now.

  A certain little guy named Murphy seems to think this is his new "nest," and every time he walks
by this chair he has to jump in it and snuggle up.

Now, because you guys know I love a good before and after, check it out...
What do you think?

What do you guys think?  Anyone else have a papasan chair you love?  Or maybe one that needs a makeover?

Monday, May 2, 2011

Old Pillows, New Look

On Saturday I showed you my lanai furniture cushion makeover, and I told you I was on a bit of a sewing kick. Well, that current sewing obsession kind of took over my Saturday, and I spent the whole day making "new" pillows for my couch.  Well, technically I was re-covering my old pillows, but they are new to me now!

When Kent and I first married and moved to Hawaii just about 2 years ago, I had all these handy dandy wedding gift cards, so I went to Pier 1 to shop the sales.  Since we had just purchased our big new super awesome sectional sofa (on sale for 30% off, plus another 20% off for buying the showroom example... great deal at $500), I needed some cute pillows to bring some color into our lives.  I found 7 that I loved, all on sale, so I bought them.  All together I think they cost about $100 or so.

Fast forward to just the other day, and I noticed that those bright and beautiful pillows were no longer so bright and beautiful.  They were looking grungy, drab, and dreary,  so I decided while I was sewing cushion covers, I could sew some pillow covers as well.  For a very brief instant, I thought about just buying new pillows, but when I thought about spending $100+ on pillows, I decided that was a no-go.  Instead I went to the fabric store, spent about $35 on fabric and cording, and came home to get to work.  Here's what I came up with.  (Lots of before and after pics... Yay!  You know I looove before and after shots.)


This one used to be nice and bright, and I liked how the texture contrasted with the texture of the other fabrics when I first bought it, but a couple years later, and it wasn't looking so hot anymore...
  I really like the result.  I used some leftover heavy duty upholstery fabric from my lanai cushions for the front and a micro-suede type material for the backs.  

The sun in our old apartment plus wear and tear from a dirty dude made this once rich brown pillow a faded, boring, blah color.  I recovered it in a very rich brown satin-y type material with a little more visual interest.  Plus I added a blue and brown cording as yet another little something extra.

The same thing had happened to this blue pillow.  It was looking pretty sad.  Now it has a much more vibrant and happy color that I'm really loving.

Here's the detail of the cording.

This next pillow used to be one of my favorites because it was a really cool lime green.  With a little wear and tear, though, it wasn't so happy looking anymore.  I fixed it by recovering it with a similar bright shiny green fabric that had gold flower embroidery.

The final pillow I'm showing you is probably my favorite... and that's because it literally took some blood and sweat (thankfully no tears) to make it.

One of my favorite and most visually interesting pillows was a paisley embroidered pillow that inspired the painting currently hanging above my couch.  As with the others, it was faded and looking tired.  It was time for a change.  However, I still wanted one that looked high end and interesting.  I took scraps from the other pillows I had made and started experimenting, and this is what I came up with.
 Each one of those little appliques is made and attached by hand.  Plus I did the embroidery part by hand.  It was definitely the most labor intensive of all (taking probably 6 hours), but I really really love it.

Here are some details.

And finally, here are some shots of my "new" pillows in their old homes.

I think it's a great change for a grand total of 35 bucks.  What do you guys think?

P.S.  I was thinking of doing a tutorial on how to do the applique pillow if anyone is interested.  Let me know if it's something you'd like to see.  :)

Saturday, April 30, 2011

Simple Sewing Makeover

Well, I'm on a MAJOR sewing kick right now.  It started with the project that I'm just about to show you...  I made covers for my lanai chair cushions.

First of all, let me just say that I wasn't going to re-cover them myself.  I had every intention of taking the easy way out and buying some nice new ones from Home Depot or somewhere. 

Then, I looked at the prices.  Ummm... no, I'm not paying $25 for one stupid cushion that's not even that cute.  So I went to the fabric store and found some pretty heavy duty upholstery fabric. (I didn't worry about the "outdoor" fabric because these are technically not outside.)  I bought 4 yards of fabric (which turned out to be too much for this project, leaving me leftovers that were perfect for something else I'll show you soon.)  That 4 yards cost $20.00.  Basically, I got 4 brand spanking new--sorta-- cushions for less than the price of one new one from Home Depot/Lowe's/wherever.  I was a happy camper.


I really really love how they came out!

The colors are so much happier than the old burgandy cushions.

Happy, right?  :)

So, once I did that project, it sparked another...

You know how when you re-do one thing and it starts looking super spiffy, you start noticing that other things look pretty shabby?  Yeah, that's what's happening right now....

I took a good look at the cushions on my couch, and they looked pretty grungy.  Two years of living with a manly, dirty dude (a.k.a. my hubby who is always working on something outside) will do that.  (No, the dogs don't do it... I never have to clean up much at all when it's just me and "the boys.")  Well, since mt lanai was looking all nice, I couldn't have grungy, yucky couch cushions!

So I hit up the fabric store... again... 

I found some things I really liked, so I brought home some more fabric.  :)  Right now, I'm finishing up a couple of the pillows, so I'm not going to show you just yet.  You'll get photos in the next few days though... More before and afters... Yay!  So be on the look out.  

Anyhoo, that's what I'm working on this weekend, as well as hopefully taking a little "me time" to lay by the pool and work reading my latest book.  I'm taking Sunday all for myself, so I'll have more for you on Monday.  Have a happy weekend!

P.S.  I told you guys I would tell you how my scones from my Royal Wedding festive-ness turned out.  Ummm... They were UH-mazing!  I highly recommend trying that recipe.  
Yum. Yum.
They turned out just like the photo in the recipe. (This is my photo)

Saturday, April 16, 2011

If At First You Don't Succeed, Try, Try Again...

If you guys remember, a while back I started making plans for some projects I needed to work on around my house.  One of those projects was the mirror above the dresser in my bedroom.

This guy right here...
 
For some reason it really bugged me that the mirror had a gold/bronze look to it (even though it doesn't show up so much in the photo), when the lamps and hardware looked like brushed nickel.


For some reason I thought it would look better if the mirror looked like the brushed nickel of the hardware.  

Okay... Maybe a little part of me also just wanted to try out this spray paint that is supposed to look like hammered metal, too.


I took my mirror outside, taped on some newspaper to protect the mirror part, and sprayed the frame.
I liked how it looked outside.  I just had so see if I still liked it when I hung it up.

So I took it upstairs and hung it up as soon as it dried...
Uhhh.... No.  I didn't like it.  Too bright and too shiny....  Maybe if I lived with it for a day or so I would change my mind...

Yeah, that didn't happen.  Two days later I still didn't like it.  
Time to try something else... Maybe if I attempt an antique type finish to tone it down.

I decided to try an experiment on the off chance it might turn into a "happy accident."  I got the antiquing glaze that I used when I refinished my night stands, and attempted antiquing the mirror frame.   I painted some on and used a dry cloth to wipe it off in hopes that it would stick in the "hammered metal" spots on the paint to tone the shine down.
Yep... That was a failure too.  The paint was still too slick for the antiquing glaze to stick.  It was worth a shot though.

Finally, I knew what I had to do.  I had to go back to brown.  Not the dark gold/bronze that it had been... just brown.  I went and bought some glossy brown spray paint to match my dresser, sprayed the mirror frame, crossed my fingers, and let it dry.

It came out like this...
Ahhhh.... Finally, I think I got it right.


Moral of this story:  You're not going to get it right the first time, every time.  Take a chance and try a new solution (even if you're not sure if it will work), and keep trying until you find something you like.  :)

Psssst.... There's a giveaway coming soon!  Make sure you're an "official" follower so you can enter to win.  You don't want to miss it!

Wednesday, April 6, 2011

Matching Tables in Action

I finally got the tables stained and coated with polyurethane.  Now they are happily back in their places in my living room, and I love them!  I only wish I had done this project sooner.

After they were stained, I had to wait 8 hours before putting on the polyurethane to protect them, so I waited patiently and got to work on them as soon as I could.

This was when they were just stained.

When it was time, I got out a nice brush and coated them with the polyurethane.
I did three coats, waiting about 3 hours between each one.  


Here they are with the polyurethane, all dried and in action in my living room!
Not too shabby for a $15 makeover investment.

And I've told you before that Murphy automatically goes into model mode when the camera comes out...

It was rainy day nap time for Kent and Duke, and they weren't moving from their napping spot so that I could take a nice neat photo, but I think they add a little interest...

And just because I love seeing before and after shots so much, here you go...


I love them so much now that I really want to protect them.  Since Kent is pretty rough on the one beside his recliner, I thought some cool coasters would be a really great idea.    

I searched around on Etsy (because I always like to support other artists when possible), and I found some really neat ones.  

I really loved these!

Aren't they awesome?  

I don't have a fruit or flower thing going on in my living room, but I really loved the look of these unique coasters , so I sent a message asking about a custom order through a link in her shop, (Be sure to check it out!)  She said she would, so I ordered simple aqua and apple green circles.  I can't wait to get them, and I'll be sure to share pictures when I do!

Saturday, April 2, 2011

Old Pillows, New Look

On Saturday I showed you my lanai furniture cushion makeover, and I told you I was on a bit of a sewing kick. Well, that current sewing obsession kind of took over my Saturday, and I spent the whole day making "new" pillows for my couch.  Well, technically I was re-covering my old pillows, but they are new to me now!

When Kent and I first married and moved to Hawaii just about 2 years ago, I had all these handy dandy wedding gift cards, so I went to Pier 1 to shop the sales.  Since we had just purchased our big new super awesome sectional sofa (on sale for 30% off, plus another 20% off for buying the showroom example... great deal at $500), I needed some cute pillows to bring some color into our lives.  I found 7 that I loved, all on sale, so I bought them.  All together I think they cost about $100 or so.

Fast forward to just the other day, and I noticed that those bright and beautiful pillows were no longer so bright and beautiful.  They were looking grungy, drab, and dreary,  so I decided while I was sewing cushion covers, I could sew some pillow covers as well.  For a very brief instant, I thought about just buying new pillows, but when I thought about spending $100+ on pillows, I decided that was a no-go.  Instead I went to the fabric store, spent about $35 on fabric and cording, and came home to get to work.  Here's what I came up with.  (Lots of before and after pics... Yay!  You know I looove before and after shots.)

This one used to be nice and bright, and I liked how the texture contrasted with the texture of the other fabrics when I first bought it, but a couple years later, and it wasn't looking so hot anymore...
  I really like the result.  I used some leftover heavy duty upholstery fabric from my lanai cushions for the front and a micro-suede type material for the backs.  

The sun in our old apartment plus wear and tear from a dirty dude made this once rich brown pillow a faded, boring, blah color.  I recovered it in a very rich brown satin-y type material with a little more visual interest.  Plus I added a blue and brown cording as yet another little something extra.

The same thing had happened to this blue pillow.  It was looking pretty sad.  Now it has a much more vibrant and happy color that I'm really loving.

Here's the detail of the cording.

This next pillow used to be one of my favorites because it was a really cool lime green.  With a little wear and tear, though, it wasn't so happy looking anymore.  I fixed it by recovering it with a similar bright shiny green fabric that had gold flower embroidery.

The final pillow I'm showing you is probably my favorite... and that's because it literally took some blood and sweat (thankfully no tears) to make it.

One of my favorite and most visually interesting pillows was a paisley embroidered pillow that inspired the painting currently hanging above my couch.  As with the others, it was faded and looking tired.  It was time for a change.  However, I still wanted one that looked high end and interesting.  I took scraps from the other pillows I had made and started experimenting, and this is what I came up with.
 Each one of those little appliques is made and attached by hand.  Plus I did the embroidery part by hand.  It was definitely the most labor intensive of all (taking probably 6 hours), but I really really love it.

Here are some details.

And finally, here are some shots of my "new" pillows in their old homes.

I think it's a great change for a grand total of 35 bucks.  What do you guys think?

P.S.  I was thinking of doing a tutorial on how to do the applique pillow if anyone is interested.  Let me know if it's something you'd like to see.  :)